Quick Start Tutorial
This is a quick start guide for the Kerbal Operating System (kOS). It is intended for those who are just starting with using kOS. It does presume you have played Kerbal Space Program before and know the basics of how to fly a rocket under manual control. It does NOT assume you know a lot about computer programming, and it will walk you through some basic first steps.
First example: Hello World
In the grand tradition of programming tutorials, the first example will be how to make a script that does nothing more than print the words “Hello World” on the screen. The purpose of this example is to show where you should put the files, how to move them about, and how to get one to run on the vessel.
Step 1: Start a new sandbox-mode game
(You can use kOS in a career mode game, but it requires a part that you have to research which isn’t available at the start of the tech tree, so this example will just use sandbox mode to keep it simple.)
Step 2: Make a vessel in the Vehicle Assembly Bay
Make the vessel contain any unmanned command core, a few hundred units of battery power, a means of recharging the battery such as a solar panel array, and the “Comptronix CX-4181 Scriptable Control System”. (From this point onward the CX-4181 Scriptable Control System part will be referred to by the acronym “SCS”.) The SCS part is located in the parts bin under the “Control” tab (the same place where RCS thrusters and Torque Wheels are found.)

Step 3: Put the vessel on the launchpad
Put the vessel on the launchpad. For this first example it doesn’t matter if the vessel can actually liftoff or even has engines at all.
Step 4: Invoke the terminal
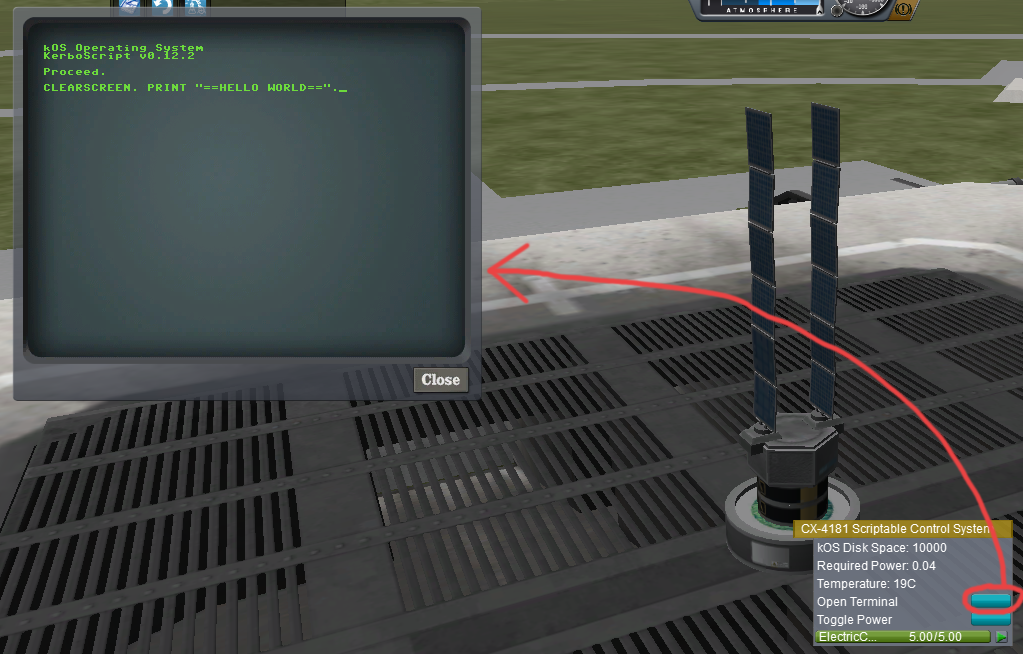
Right click for the SCS part on the vessel and then click the button that says “Open Terminal”.
Note that if the terminal is semi-transparent, this means it’s not currently selected. If you click on the terminal, then your keyboard input is directed to the terminal INSTEAD of to piloting. In other words if you type W A S D, you’ll actually get the word “wasd” to appear on the terminal, rather than the W A S D keys steering the ship. To switch back to manual control of the game instead of typing into the terminal, click outside the terminal window anywhere on the background of the screen.
Step 5: See what an interactive command is like
You should now see an old-school looking text terminal like the one shown below. Type the line:
CLEARSCREEN. PRINT "==HELLO WORLD==".
into the terminal (make sure to actually type the periods (“.”) as shown) and hit ENTER. Note that you can type it in uppercase or lowercase. kOS doesn’t care.
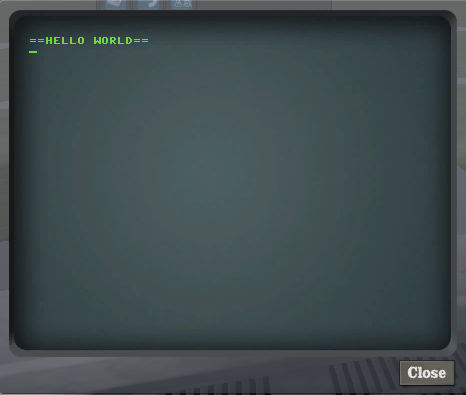
The terminal will respond by showing you this:
Step 6: Okay that’s great, but how can you make that happen in a program script instead?
Like so: Enter this command:
EDIT HELLO.
(Don’t forget the period (“.”). All commands in kOS are ended with a period. Again, you can type it in uppercase or lowercase. kOS doesn’t care.)
You should see an editor window appear, looking something like this (without the text inside because you’re starting a blank new file):
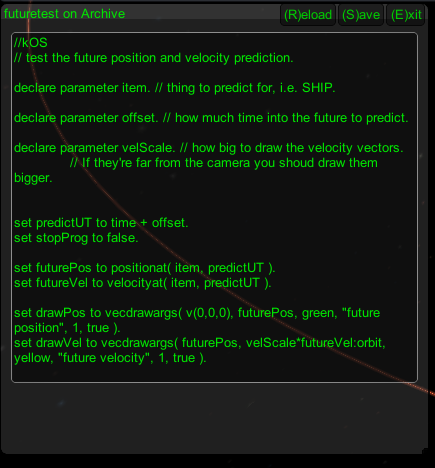
Type this text into the window:
PRINT "=========================================".
PRINT "      HELLO WORLD".
PRINT "THIS IS THE FIRST SCRIPT I WROTE IN kOS.".
PRINT "=========================================".
Click “Save” then “Exit” in the editor pop-up window.
Side Note: The editor font - Experienced programmers may have noticed that the editor’s font is proportional width rather than monospaced and that this is not ideal for programming work. You are right, but there is little that can be done about it for a variety of technical reasons that are too complex to go into right now.
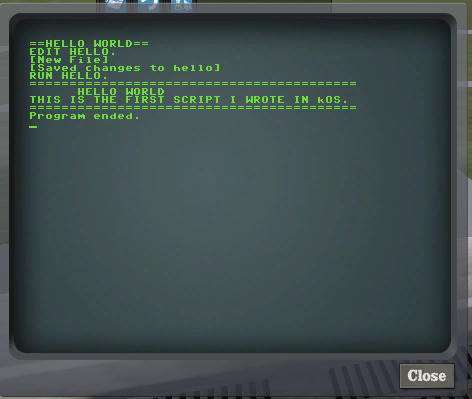
Then on the main text terminal Enter:
RUN HELLO.
And you will see the program run, showing the text on the screen like so.
Note
You can also type RUNPATH("hello") instead of RUN HELLO. The
commands are slightly different but should have the same effect. You can
learn about the specific difference between them later here.
Step 7: Okay, but where is this program?
To see where the “HELLO” program has been saved, Issue the command LIST FILES like this:
LIST FILES.
(Note, that the default for the LIST command is to list FILES, so you can leave the word “FILES” off if you like.)
It should look like this, showing you the HELLO program you just wrote:
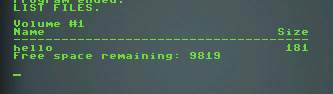
This is a list of all the files on the currently selected VOLUME. By default, when you launch a new vessel, the currently selected VOLUME is called “1” and it’s the volume that’s stored on THAT SCS part that you are running all these commands in.
This is the local volume of that SCS part. Local volumes such at this tend to have very small limited storage, as you can see when you look at the space remaining in the list printout.
If you’re wondering where the file is stored physically on your computer, it’s represented by a section inside the persistence file for your saved game, as a piece of data associated with the SCS part. This is important because it means you can’t access the program from another vessel, and if this vessel ever crashes and the SCS part explodes, then you’ve lost the program.
Step 8: I don’t like the idea that the program is stored only on this vessel. Can’t I save it somewhere better? More permanent?
Yes. Yes you can.
There is another VOLUME that always exists called the Archive, which is also referred to as volume 0. (either name can be used in commands). The archive is conceptually stored somewhere back at Kerbin home base in the Space Center rather than on your vessel. It has infinite storage space, and does not disappear when your vessel is gone. ALSO, it actually exists across saved games - if you launch one saved game, put a new file in the Archive, and then later launch a different saved game, that file will be there in that game too.
To use the Archive, first we’ll have to introduce you to a new command, called SWITCH TO. The SWITCH TO command changes which VOLUME is the one that you are doing your work with.
To work with the archive, and create a second “hello world” file there, you issue these commands and see what they do:
SWITCH TO 0.
EDIT HELLO2. // Make a new file here that just says: PRINT "hi again".
LIST FILES.
RUN HELLO2.
SWITCH TO 1.
LIST FILES.
RUN HELLO.
But where is it stored behind the scenes? The archive is currently slightly violating the design of KSP mods that puts everything in the GameData folder. The kSP Archive is actually stored in the Ships/Script folder of your MAIN KSP home, not inside GameData.
If a file is stored inside the archive, it can actually be edited by an external text editor of your choice instead of using kOS’s in-game editor. This is usually a much better practice once you start doing more complex things with kOS. You can also make new files in the archive folder. Just make sure that all the files end with a .ks file name suffix or kOS won’t use them.
Further reading about files and volumes:
Step 9: But can I make it boot automatically when I launch the vessel?
Yes. It is possible to create a boot file and have kOS automatically copy it to the vessel, then run it, when the vessel is first put on the launchpad. You don’t have to do so right now to follow this tutorial, but be aware that this feature exists and it’s one you will probably want to make use of eventually. It’s described in more detail here.
Second Example: Doing something real
Okay that’s all basic setup stuff but you’re probably clamoring for a real example that actually does something nifty.
This example will show the crudest, most basic use of kOS just to get started. In this example we’ll make a program that will launch a vessel using progressively more and more complex checks. kOS can be used at any stage of a vessel’s flight - launching, circularizing, docking, landing,… and in fact launching is one of the simpler piloting tasks that you can do without much need of automation. Where kOS really shines is for writing scripts to do touchy sensitive tasks like landing or docking or hovering. These are the areas that can benefit from the faster reaction speed that a computer script can handle.
But in order to give you an example that you can start with from scratch, that’s easy to reload and retry from an initial point, we’ll use an example of launching.
Step 1: Make a vessel
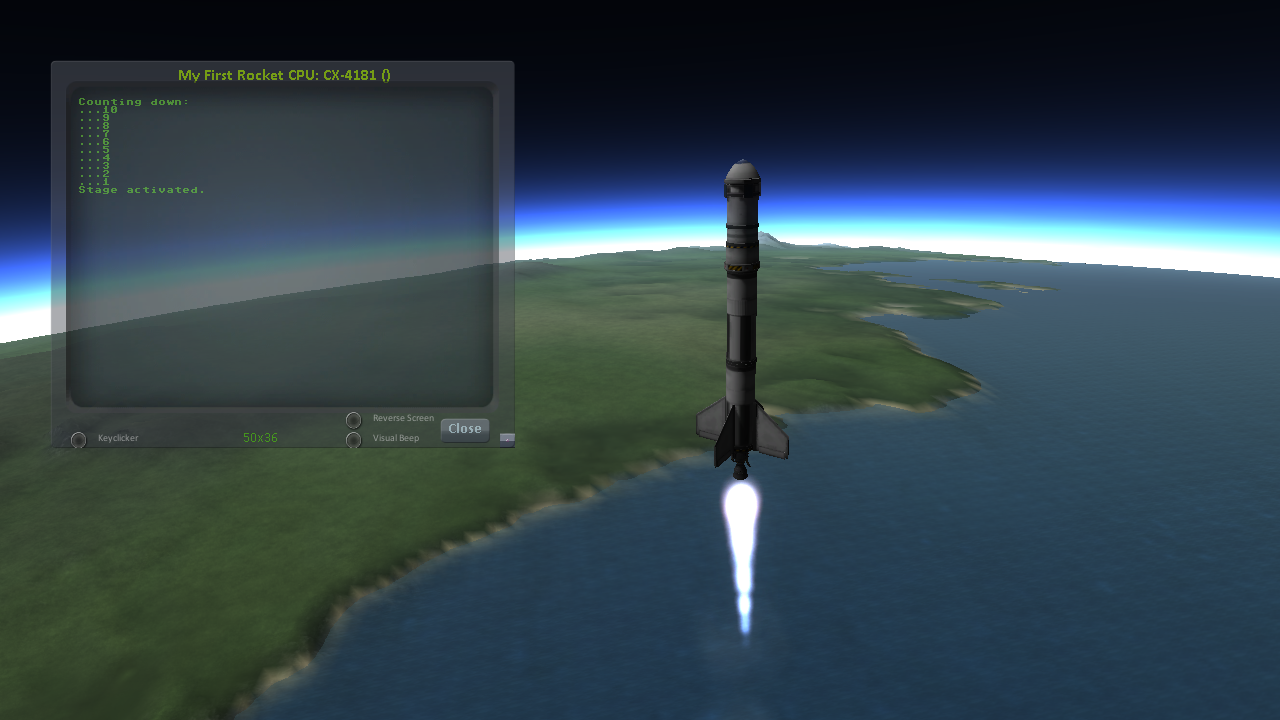
This tutorial is designed to work with a very specific rocket design. You need to make the vessel you see here:
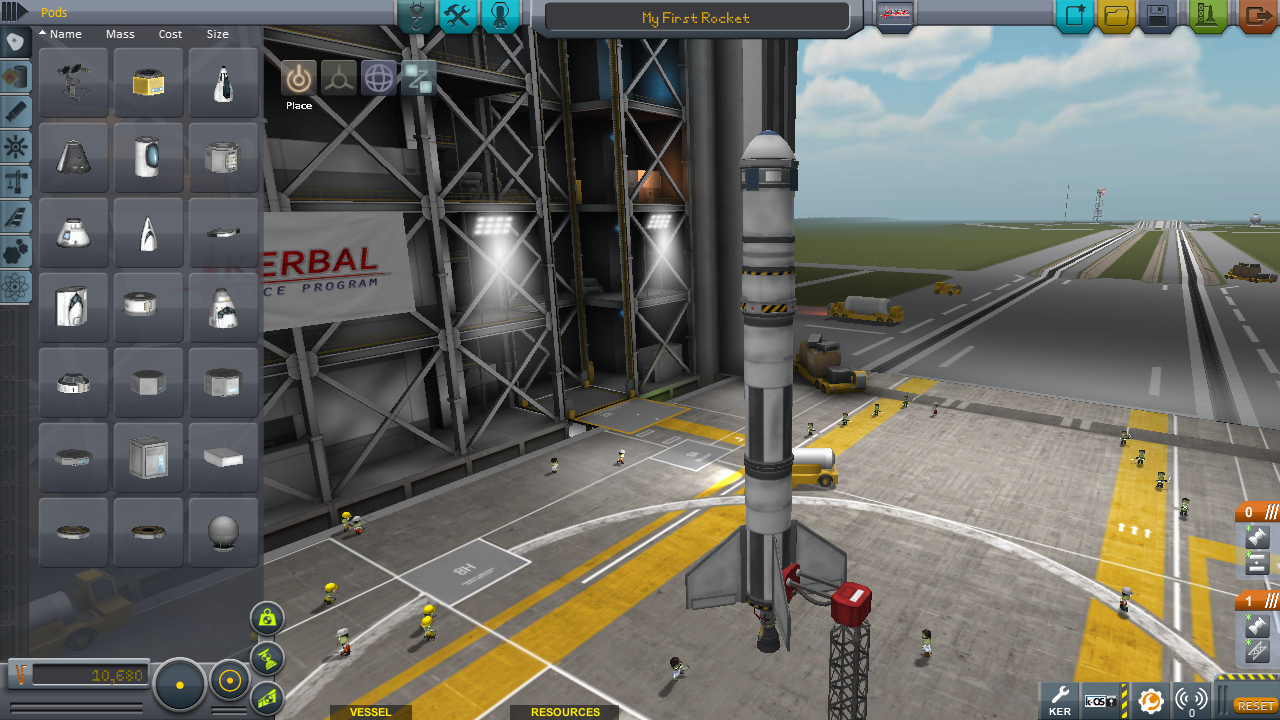
If you prefer, you can instead download the .craft file here
Step 2: Make the start of the script
Okay, so type the lines below in an external text editor of your choice (i.e. Notepad on Windows, or TextEdit on Mac, or whatever you fancy):
//hellolaunch

//First, we'll clear the terminal screen to make it look nice
CLEARSCREEN.

//This is our countdown loop, which cycles from 10 to 0
PRINT "Counting down:".
FROM {local countdown is 10.} UNTIL countdown = 0 STEP {SET countdown to countdown - 1.} DO {
    PRINT "..." + countdown.
    WAIT 1. // pauses the script here for 1 second.
}
See those things with the two slashes (“//”)? Those are comments in the Kerboscript language and they’re just ways to write things in the program that don’t do anything - they’re there for humans like you to read so you understand what’s going on. In these examples you never actually have to type in the things you see after the slashes. They’re there for your benefit when reading this document but you can leave them out if you wish.
Save the file in your Ships/Script folder of your KSP installation under the filename “hellolaunch.ks”. DO NOT save it anywhere under GameData/kOS/. Do NOT. According to the KSP standard, normally KSP mods should put their files in GameData/[mod name], but kOS puts the archive outside the GameData folder because it represents content owned by you, the player, not content owned by the kOS mod.
By saving the file in Ships/Script, you have actually put it in your archive volume of kOS. kOS will see it there immediately without delay. You do not need to restart the game. If you do:
SWITCH TO 0.
LIST FILES.
after saving the file from your external text editor program, you will see a listing of your file “hellolaunch” right away. Okay, now copy it to your local drive and give it a try running it from there:
SWITCH TO 1.
COPYPATH("0:/HELLOLAUNCH", ""). // copies from 0 (archive) to current default location (local drive (1)).
RUN HELLOLAUNCH.
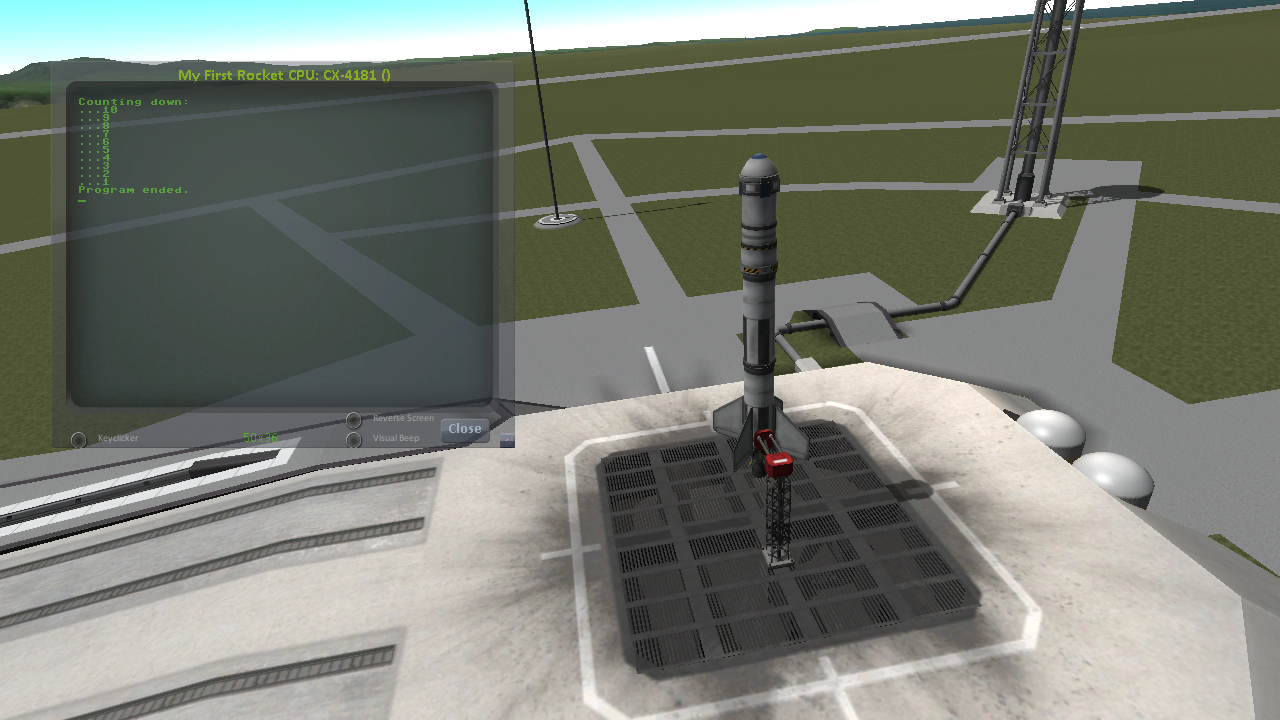
Okay so the program doesn’t actually DO anything yet other than just countdown from 10 to 0. A bit of a disappointment, but we haven’t written the rest of the program yet.
You’ll note that what you’ve done is switch to the local volume (1) and then copy the program from the archive (0) to the local volume (1) and then run it from the local volume. Technically you didn’t need to do this. You could have just run it directly from the archive. For those looking at the KSP game as a bit of a role-play experience, it makes sense to never run programs directly from the archive, and instead live with the limitation that software should be copied to the craft for it to be able to run it.
Step 3: Make the script actually do something
Okay now go back into your text editor of choice and append a few more lines to the hellolaunch.ks file so it now looks like this:
//hellolaunch

//First, we'll clear the terminal screen to make it look nice
CLEARSCREEN.

//Next, we'll lock our throttle to 100%.
LOCK THROTTLE TO 1.0.   // 1.0 is the max, 0.0 is idle.

//This is our countdown loop, which cycles from 10 to 0
PRINT "Counting down:".
FROM {local countdown is 10.} UNTIL countdown = 0 STEP {SET countdown to countdown - 1.} DO {
    PRINT "..." + countdown.
    WAIT 1. // pauses the script here for 1 second.
}

UNTIL SHIP:MAXTHRUST > 0 {
    WAIT 0.5. // pause half a second between stage attempts.
    PRINT "Stage activated.".
    STAGE. // same as hitting the spacebar.
}

WAIT UNTIL SHIP:ALTITUDE > 70000.

// NOTE that it is vital to not just let the script end right away
// here.  Once a kOS script just ends, it releases all the controls
// back to manual piloting so that you can fly the ship by hand again.
// If the program just ended here, then that would cause the throttle
// to turn back off again right away and nothing would happen.
Save this file to hellolaunch.ks again, and re-copy it to your vessel that should still be sitting on the launchpad, then run it, like so:
COPYPATH("0:/HELLOLAUNCH", "").
RUN HELLOLAUNCH. // You could also say RUNPATH("hellolaunch") here.
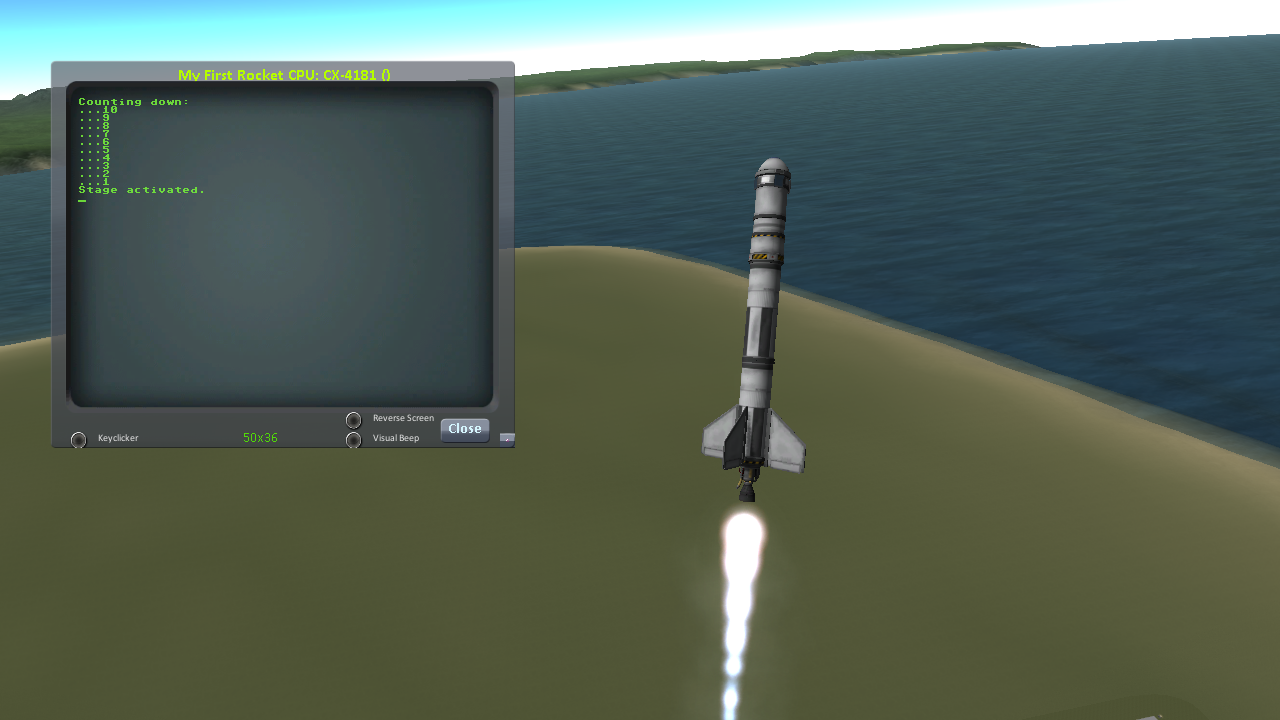
Hey! It does something now! It fires the first stage engine and launches!
But.. but wait… It doesn’t control the steering and it just lets it go where ever it will.
Most likely you had a crash with this script because it didn’t do anything to affect the steering at all, so it probably allowed the rocket to tilt over.
Step 4: Make the script actually control steering
So to fix that problem, let’s add steering control to the script.
The easy way to control steering is to use the LOCK STEERING command.
Once you have mastered the basics of kOS, you should go and read the documentation on ship steering techniques, but that’s a more advanced topic for later.
The way to use the LOCK STEERING command is to set it to a thing called a Vector or a Direction. There are several Directions built-in to kOS, one of which is called “UP”. “UP” is a Direction that always aims directly toward the sky (the center of the blue part of the navball).
So to steer always UP, just do this:
LOCK STEERING TO UP.
So if you just add this one line to your script, you’ll get something that should keep the craft aimed straight up and not let it tip over. Add the line just after the line that sets the THROTTLE, like so:
//hellolaunch

//First, we'll clear the terminal screen to make it look nice
CLEARSCREEN.

//Next, we'll lock our throttle to 100%.
LOCK THROTTLE TO 1.0.   // 1.0 is the max, 0.0 is idle.

//This is our countdown loop, which cycles from 10 to 0
PRINT "Counting down:".
FROM {local countdown is 10.} UNTIL countdown = 0 STEP {SET countdown to countdown - 1.} DO {
    PRINT "..." + countdown.
    WAIT 1. // pauses the script here for 1 second.
}

//This is the line we added
LOCK STEERING TO UP.

UNTIL SHIP:MAXTHRUST > 0 {
    WAIT 0.5. // pause half a second between stage attempts.
    PRINT "Stage activated.".
    STAGE. // same as hitting the spacebar.
}

WAIT UNTIL SHIP:ALTITUDE > 70000.

// NOTE that it is vital to not just let the script end right away
// here.  Once a kOS script just ends, it releases all the controls
// back to manual piloting so that you can fly the ship by hand again.
// If the program just ended here, then that would cause the throttle
// to turn back off again right away and nothing would happen.
Again, copy this and run it, like before. If your craft crashed in the previous step, which it probably did, then revert to the VAB and re-launch it.:
SWITCH TO 1. // should be the default already, but just in case.
COPYPATH("0:/HELLOLAUNCH", "").
RUN HELLOLAUNCH. // You could also say RUNPATH("hellolaunch") here.
Now you should see the same thing as before, but now your craft will stay pointed up.
But wait - it only does the first stage and then it stops without doing the next stage? how do I fix that?
Step 5: Add staging logic
The logic for how and when to stage can be an interesting and fun thing to write yourself. This example will keep it very simple, and this is the part where it’s important that you are using a vessel that only contains liquidfuel engines. If your vessel has some booster engines, then it would require a more sophisticated script to launch it correctly than this tutorial gives you.
To add the logic to check when to stage, we introduce a new concept called the WHEN trigger. To see full documentation on it when you finish the tutorial, look for it on the Flow Control page
The quick and dirty explanation is that a WHEN section is a short section of code that you set up to run LATER rather than right now. It creates a check in the background that will constantly look for some condition to occur, and when it happens, it interrupts whatever else the code is doing, and it will run the body of the WHEN code before continuing from where it left off in the main script.
There are some complex dangers with writing WHEN triggers that can cause KSP itself to hang or stutter if you are not careful, but explaining them is beyond the scope of this tutorial. But when you want to start using WHEN triggers yourself, you really should read the section on WHEN in the Flow Control page before you do so.
The WHEN trigger we are going to add to the launch script looks like this:
WHEN MAXTHRUST = 0 THEN {
    PRINT "Staging".
    STAGE.
    PRESERVE.
}.
It says, “Whenever the maximum thrust of our vehicle is zero, then activate the next stage.” The PRESERVE keyword says, “don’t stop checking this condition just because it’s been triggered once. It should still keep checking for it again in the future.” If this block of code is inserted into the script, then it will set up a constant background check that will always hit the next stage as soon as the current stage has no thrust. UNLIKE with all the previous edits this tutorial has asked you to make to the script, this time you’re going to be asked to delete something and replace it. The new WHEN section above should actually REPLACE the existing “UNTIL SHIP:MAXTHRUST > 0” loop that you had before.
Now your script should look like this:
//hellolaunch

//First, we'll clear the terminal screen to make it look nice
CLEARSCREEN.

//Next, we'll lock our throttle to 100%.
LOCK THROTTLE TO 1.0.   // 1.0 is the max, 0.0 is idle.

//This is our countdown loop, which cycles from 10 to 0
PRINT "Counting down:".
FROM {local countdown is 10.} UNTIL countdown = 0 STEP {SET countdown to countdown - 1.} DO {
    PRINT "..." + countdown.
    WAIT 1. // pauses the script here for 1 second.
}

//This is a trigger that constantly checks to see if our thrust is zero.
//If it is, it will attempt to stage and then return to where the script
//left off. The PRESERVE keyword keeps the trigger active even after it
//has been triggered.
WHEN MAXTHRUST = 0 THEN {
    PRINT "Staging".
    STAGE.
    PRESERVE.
}.

LOCK STEERING TO UP.

WAIT UNTIL ALTITUDE > 70000.

// NOTE that it is vital to not just let the script end right away
// here.  Once a kOS script just ends, it releases all the controls
// back to manual piloting so that you can fly the ship by hand again.
// If the program just ended here, then that would cause the throttle
// to turn back off again right away and nothing would happen.
Again, relaunch the ship, copy the script as before, and run it again. This time you should see it activate your later upper stages correctly.

Step 6: Now to make it turn
Okay that’s fine but it still just goes straight up! What about a gravity turn?
Well, a true and proper gravity turn is a very complex bit of math that is best left as an exercise for the reader, given that the goal of kOS is to let you write your OWN autopilot, not to write it for you. But to give some basic examples of commands, lets just make a crude gravity turn approximation that simply flies the ship like a lot of new KSP pilots learn to do it for the first time:
Fly straight up until your velocity is 100m/s.
Pitch ten degrees towards the East.
Continue to pitch 10 degrees down for each 100m/s of velocity.
To make this work, we introduce a new way to make a Direction, called the HEADING function. Whenever you call the function HEADING(a,b), it makes a Direction oriented as follows on the navball:
Point at the compass heading A.
Pitch up a number of degrees from the horizon = to B.
So for example, HEADING(45,10) would aim northeast, 10 degrees above the horizon. We can use this to easily set our orientation. For example:
//This locks our steering to due east, pitched 45 degrees above the horizon.
LOCK STEERING TO HEADING(90,45).
Instead of using WAIT UNTIL to pause the script and keep it from exiting, we can use an UNTIL loop to constantly perform actions until a certain condition is met. For example:
SET MYSTEER TO HEADING(90,90). //90 degrees east and pitched up 90 degrees (straight up)
LOCK STEERING TO MYSTEER. // from now on we'll be able to change steering by just assigning a new value to MYSTEER
UNTIL APOAPSIS > 100000 {
    SET MYSTEER TO HEADING(90,90). //90 degrees east and pitched up 90 degrees (straight up)
    PRINT ROUND(SHIP:APOAPSIS,0) AT (0,16). // prints new number, rounded to the nearest integer.
    //We use the PRINT AT() command here to keep from printing the same thing over and
    //over on a new line every time the loop iterates. Instead, this will always print
    //the apoapsis at the same point on the screen.
}.
This loop will continue to execute all of its instructions until the apoapsis reaches 100km. Once the apoapsis is past 100km, the loop exits and the rest of the code continues.
We can combine this with IF statements in order to have one main loop that only executes certain chunks of its code under certain conditions. For example:
SET MYSTEER TO HEADING(90,90).
LOCK STEERING TO MYSTEER.
UNTIL SHIP:APOAPSIS > 100000 { //Remember, all altitudes will be in meters, not kilometers

    //For the initial ascent, we want our steering to be straight
    //up and rolled due east
    IF SHIP:VELOCITY:SURFACE:MAG < 100 {
        //This sets our steering 90 degrees up and yawed to the compass
        //heading of 90 degrees (east)
        SET MYSTEER TO HEADING(90,90).

    //Once we pass 100m/s, we want to pitch down ten degrees
    } ELSE IF SHIP:VELOCITY:SURFACE:MAG >= 100 AND SHIP:VELOCITY:SURFACE:MAG < 200 {
        SET MYSTEER TO HEADING(90,80).
        PRINT "Pitching to 80 degrees" AT(0,15).
        PRINT ROUND(SHIP:APOAPSIS,0) AT (0,16).
    }.
}.
Each time this loop iterates, it will check the surface velocity. If the velocity is below 100m/s, it will continuously execute the first block of instructions. Once the velocity reaches 100m/s, it will stop executing the first block and start executing the second block, which will pitch the nose down to 80 degrees above the horizon.
Putting this into your script, it should look like this:
//hellolaunch

//First, we'll clear the terminal screen to make it look nice
CLEARSCREEN.

//Next, we'll lock our throttle to 100%.
LOCK THROTTLE TO 1.0.   // 1.0 is the max, 0.0 is idle.

//This is our countdown loop, which cycles from 10 to 0
PRINT "Counting down:".
FROM {local countdown is 10.} UNTIL countdown = 0 STEP {SET countdown to countdown - 1.} DO {
    PRINT "..." + countdown.
    WAIT 1. // pauses the script here for 1 second.
}

//This is a trigger that constantly checks to see if our thrust is zero.
//If it is, it will attempt to stage and then return to where the script
//left off. The PRESERVE keyword keeps the trigger active even after it
//has been triggered.
WHEN MAXTHRUST = 0 THEN {
    PRINT "Staging".
    STAGE.
    PRESERVE.
}.

//This will be our main control loop for the ascent. It will
//cycle through continuously until our apoapsis is greater
//than 100km. Each cycle, it will check each of the IF
//statements inside and perform them if their conditions
//are met
SET MYSTEER TO HEADING(90,90).
LOCK STEERING TO MYSTEER. // from now on we'll be able to change steering by just assigning a new value to MYSTEER
UNTIL SHIP:APOAPSIS > 100000 { //Remember, all altitudes will be in meters, not kilometers

    //For the initial ascent, we want our steering to be straight
    //up and rolled due east
    IF SHIP:VELOCITY:SURFACE:MAG < 100 {
        //This sets our steering 90 degrees up and yawed to the compass
        //heading of 90 degrees (east)
        SET MYSTEER TO HEADING(90,90).

    //Once we pass 100m/s, we want to pitch down ten degrees
    } ELSE IF SHIP:VELOCITY:SURFACE:MAG >= 100 {
        SET MYSTEER TO HEADING(90,80).
        PRINT "Pitching to 80 degrees" AT(0,15).
        PRINT ROUND(SHIP:APOAPSIS,0) AT (0,16).
    }.
}.
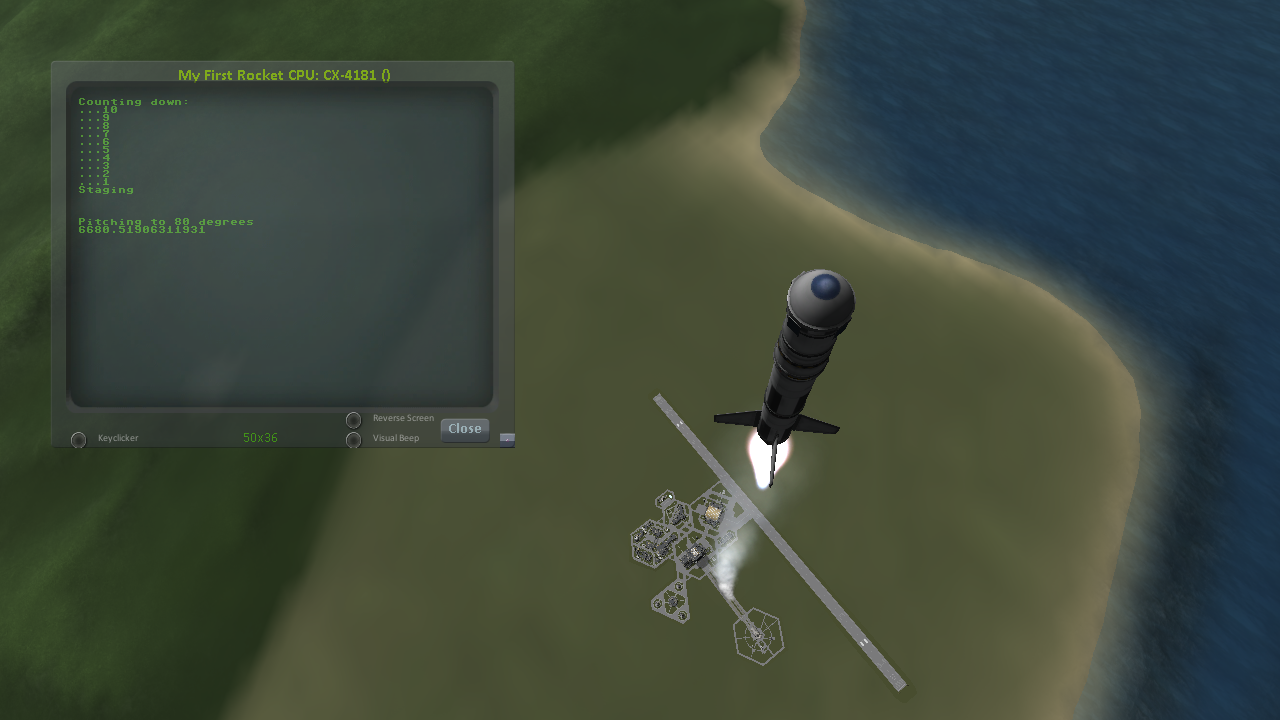
Again, copy this into your script and run it. You should see your countdown occur, then it will launch. Once the ship passes 100m/s surface velocity, it will pitch down to 80 degrees and continuously print the apoapsis until the apoapsis reaches 100km, staging if necessary. The script will then end.
Step 7: Putting it all together
We now have every element of the script necessary to do a proper (albeit simple) gravity turn. We just need to extend it all the way through the ascent.
Adding additional IF statements inside our main loop will allow us to perform further actions based on our velocity. Each IF statement you see in the script below covers a 100m/s block of velocity, and will adjust the pitch 10 degrees farther down than the previous block.
You can see that with the AND statement, we can check multiple conditions and only execute that block when all of those conditions are true. We can carefully set up the conditions for each IF statement to allow a block of code to be executed no matter what our surface velocity is.
Copy this into your script and run it. It should take you nearly to orbit:
//hellolaunch

//First, we'll clear the terminal screen to make it look nice
CLEARSCREEN.

//Next, we'll lock our throttle to 100%.
LOCK THROTTLE TO 1.0.   // 1.0 is the max, 0.0 is idle.

//This is our countdown loop, which cycles from 10 to 0
PRINT "Counting down:".
FROM {local countdown is 10.} UNTIL countdown = 0 STEP {SET countdown to countdown - 1.} DO {
    PRINT "..." + countdown.
    WAIT 1. // pauses the script here for 1 second.
}

//This is a trigger that constantly checks to see if our thrust is zero.
//If it is, it will attempt to stage and then return to where the script
//left off. The PRESERVE keyword keeps the trigger active even after it
//has been triggered.
WHEN MAXTHRUST = 0 THEN {
    PRINT "Staging".
    STAGE.
    PRESERVE.
}.

//This will be our main control loop for the ascent. It will
//cycle through continuously until our apoapsis is greater
//than 100km. Each cycle, it will check each of the IF
//statements inside and perform them if their conditions
//are met
SET MYSTEER TO HEADING(90,90).
LOCK STEERING TO MYSTEER. // from now on we'll be able to change steering by just assigning a new value to MYSTEER
UNTIL SHIP:APOAPSIS > 100000 { //Remember, all altitudes will be in meters, not kilometers

    //For the initial ascent, we want our steering to be straight
    //up and rolled due east
    IF SHIP:VELOCITY:SURFACE:MAG < 100 {
        //This sets our steering 90 degrees up and yawed to the compass
        //heading of 90 degrees (east)
        SET MYSTEER TO HEADING(90,90).

    //Once we pass 100m/s, we want to pitch down ten degrees
    } ELSE IF SHIP:VELOCITY:SURFACE:MAG >= 100 AND SHIP:VELOCITY:SURFACE:MAG < 200 {
        SET MYSTEER TO HEADING(90,80).
        PRINT "Pitching to 80 degrees" AT(0,15).
        PRINT ROUND(SHIP:APOAPSIS,0) AT (0,16).

    //Each successive IF statement checks to see if our velocity
    //is within a 100m/s block and adjusts our heading down another
    //ten degrees if so
    } ELSE IF SHIP:VELOCITY:SURFACE:MAG >= 200 AND SHIP:VELOCITY:SURFACE:MAG < 300 {
        SET MYSTEER TO HEADING(90,70).
        PRINT "Pitching to 70 degrees" AT(0,15).
        PRINT ROUND(SHIP:APOAPSIS,0) AT (0,16).

    } ELSE IF SHIP:VELOCITY:SURFACE:MAG >= 300 AND SHIP:VELOCITY:SURFACE:MAG < 400 {
        SET MYSTEER TO HEADING(90,60).
        PRINT "Pitching to 60 degrees" AT(0,15).
        PRINT ROUND(SHIP:APOAPSIS,0) AT (0,16).

    } ELSE IF SHIP:VELOCITY:SURFACE:MAG >= 400 AND SHIP:VELOCITY:SURFACE:MAG < 500 {
        SET MYSTEER TO HEADING(90,50).
        PRINT "Pitching to 50 degrees" AT(0,15).
        PRINT ROUND(SHIP:APOAPSIS,0) AT (0,16).

    } ELSE IF SHIP:VELOCITY:SURFACE:MAG >= 500 AND SHIP:VELOCITY:SURFACE:MAG < 600 {
        SET MYSTEER TO HEADING(90,40).
        PRINT "Pitching to 40 degrees" AT(0,15).
        PRINT ROUND(SHIP:APOAPSIS,0) AT (0,16).

    } ELSE IF SHIP:VELOCITY:SURFACE:MAG >= 600 AND SHIP:VELOCITY:SURFACE:MAG < 700 {
        SET MYSTEER TO HEADING(90,30).
        PRINT "Pitching to 30 degrees" AT(0,15).
        PRINT ROUND(SHIP:APOAPSIS,0) AT (0,16).

    } ELSE IF SHIP:VELOCITY:SURFACE:MAG >= 700 AND SHIP:VELOCITY:SURFACE:MAG < 800 {
        SET MYSTEER TO HEADING(90,11).
        PRINT "Pitching to 20 degrees" AT(0,15).
        PRINT ROUND(SHIP:APOAPSIS,0) AT (0,16).

    //Beyond 800m/s, we can keep facing towards 10 degrees above the horizon and wait
    //for the main loop to recognize that our apoapsis is above 100km
    } ELSE IF SHIP:VELOCITY:SURFACE:MAG >= 800 {
        SET MYSTEER TO HEADING(90,10).
        PRINT "Pitching to 10 degrees" AT(0,15).
        PRINT ROUND(SHIP:APOAPSIS,0) AT (0,16).

    }.

}.

PRINT "100km apoapsis reached, cutting throttle".

//At this point, our apoapsis is above 100km and our main loop has ended. Next
//we'll make sure our throttle is zero and that we're pointed prograde
LOCK THROTTLE TO 0.

//This sets the user's throttle setting to zero to prevent the throttle
//from returning to the position it was at before the script was run.
SET SHIP:CONTROL:PILOTMAINTHROTTLE TO 0.
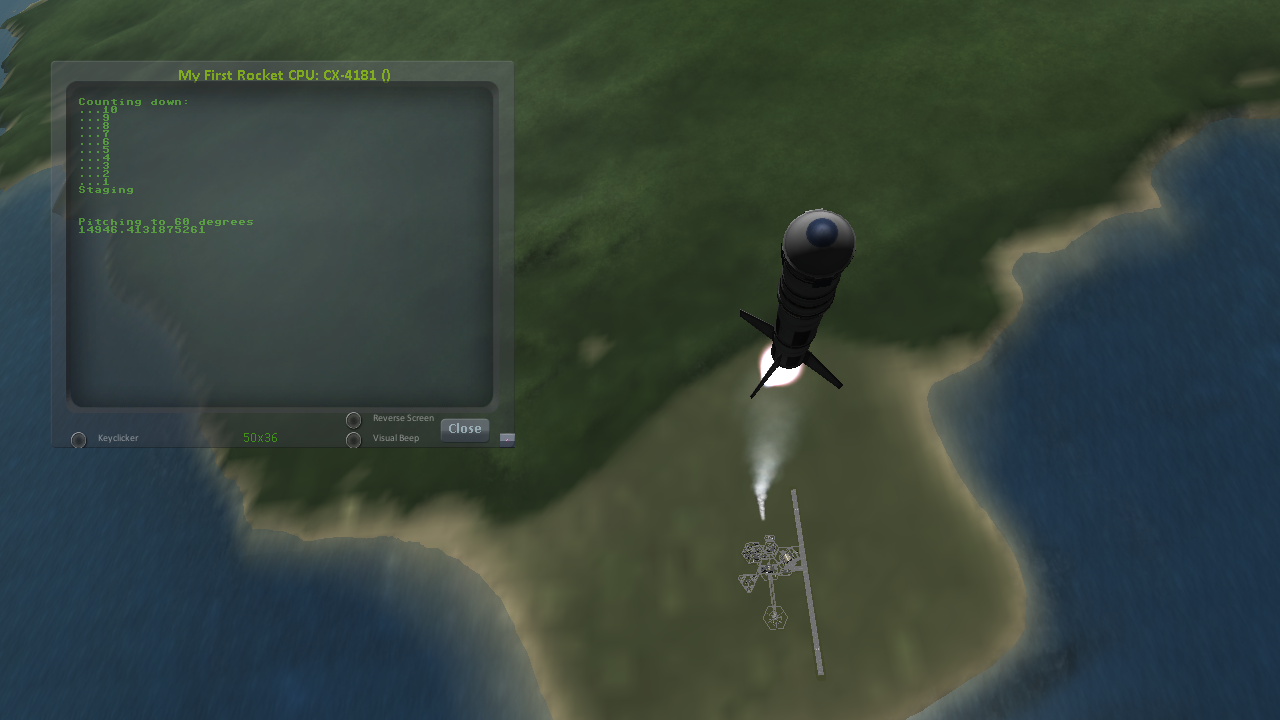
And here is it in action:
And toward the end:
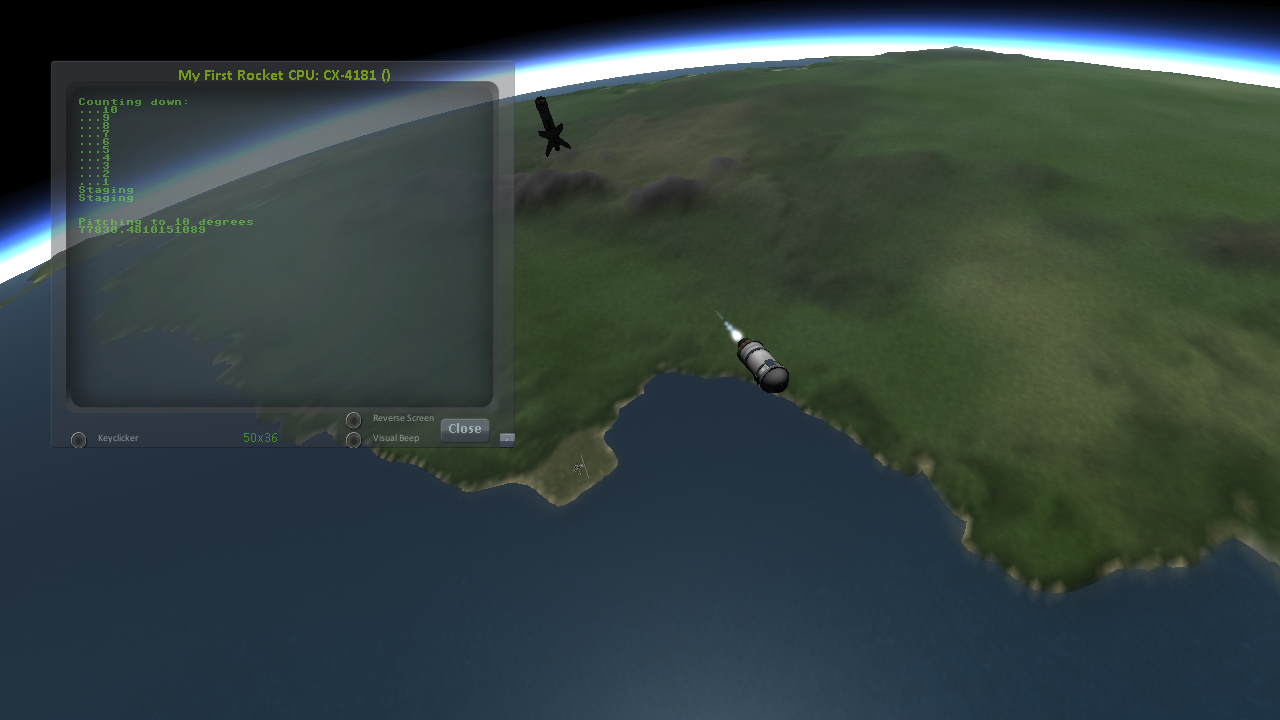
This script should, in principle, work to get you to the point of leaving the atmosphere. It will probably still fall back down, because this script makes no attempt to ensure that the craft is going fast enough to maintain the orbit.
As you can probably see, it would still have a long way to go before it would become a really GOOD launching autopilot. Think about the following features you could add yourself as you become more familiar with kOS:
You could change the steering logic to make a more smooth gravity turn by constantly adjusting the pitch in the HEADING according to some math formula. The example shown here tends to create a “too high” launch that’s a bit inefficient. In addition, this method relies on velocity to determine pitch angle, which could result in some very firey launches for other ships with a higher TWR profile.
This script just stupidly leaves the throttle at max the whole way. You could make it more sophisticated by adjusting the throttle as necessary to avoid velocities that result in high atmospheric heating.
This script does not attempt to circularize. With some simple checks of the time to apoapsis and the orbital velocity, you can execute a burn that circularizes your orbit.
With even more sophisticated checks, the script could be made to work with fancy staging methods like asparagus.
Using the PRINT AT command, you can make fancier status readouts in the terminal window as the script runs.